SQL Server Views
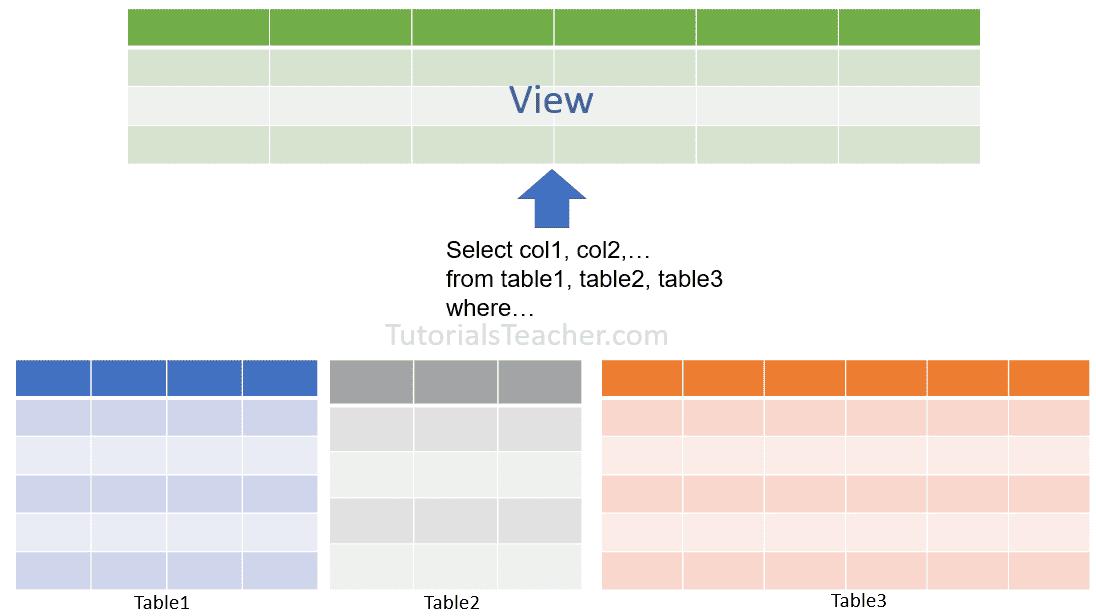
In SQL Server, a view is a virtual table whose values are defined by a query. In another word, a view is a name given to a query that can be used as a table. The rows and columns of a view come from tables referenced by a query.
The following figure illustrates the view in SQL Server.
Types of Views
User-defined Views: As the name suggests, this type of view is defined by the DB users. The compiled query is stored in the database.
Indexed Views: When you create a unique clustered index on a user-defined view, it becomes an indexed view. It improves the performance for the queries that aggregate many rows. They are not good where the data is updated frequently.
Partitioned Views: A partitioned view joins horizontally partitioned data from a set of member tables across one or more servers.
System Views: System views expose metadata in the database. They can be used to get information about the instance of SQL Server or the database objects, e.g. the sys.databases view to return information about the user-defined databases available in the instance.
Important Points
- Unless indexed, a view does not exist as a stored set of data values in a database.
- Views can be created by using tables or other views in the current or other databases.
- The SQL statements comprising the view are stored in the database and not the resulting data.
- The data from a view is generated dynamically when a view is referenced.
- Views are used as a security mechanism to mask the underlying base tables and permit user access only to the view.
Create View Using T-SQL
The following is a T-SQL syntax to create a new view.
CREATE VIEW <schema_name>.<view_name>
AS
    SELECT column1, column2, ...
    FROM table1, table2,...
    [WHERE];
The following T-SQL script creates a new view named EmployeeAddress in the database.
CREATE VIEW dbo.EmployeeAddress
    AS
    SELECT emp.FirstName, emp.LastName, emp.HireDate, addr.Address
    FROM Employee emp JOIN Address addr
    on emp.EmployeeID = addr.EmployeeID;
In the above example, the EmployeeAddress view is created with the query written after AS keyword. It contains records returned by its query.
Create View using SQL Server Management Studio
Step 1: Open SSMS and connect to the database instance.
Step 2: In Object Explorer, expand the database where you want to create a view.
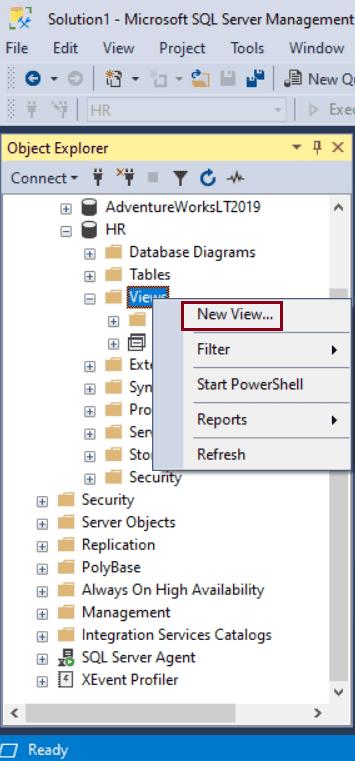
Step 3: Right-click on the Views folder and select New View..., as shown below.
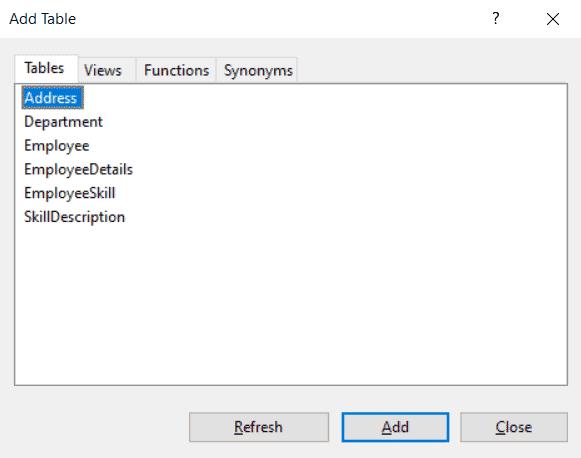
Step 4: In the "Add Table" dialog box, select one or more tables, existing views, functions, or synonyms to be used to create a new view from one of the tabs: Tables, Views, Functions, and Synonyms. Here, we will add the Employee and Address table. Click on the Close button to close it.
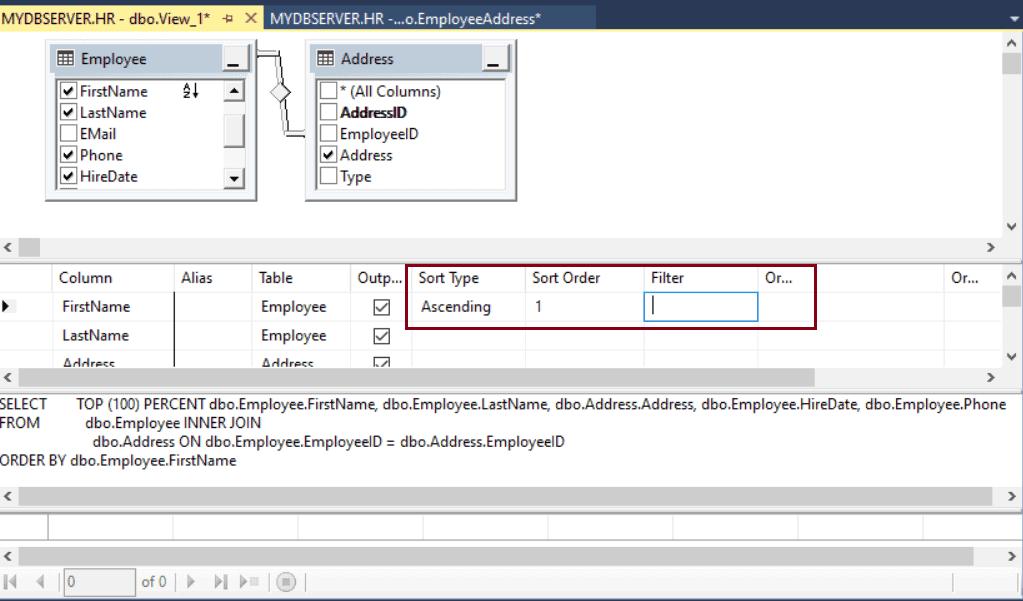
Step 5: In the diagram pane, select the columns or other elements to be added to the new view.
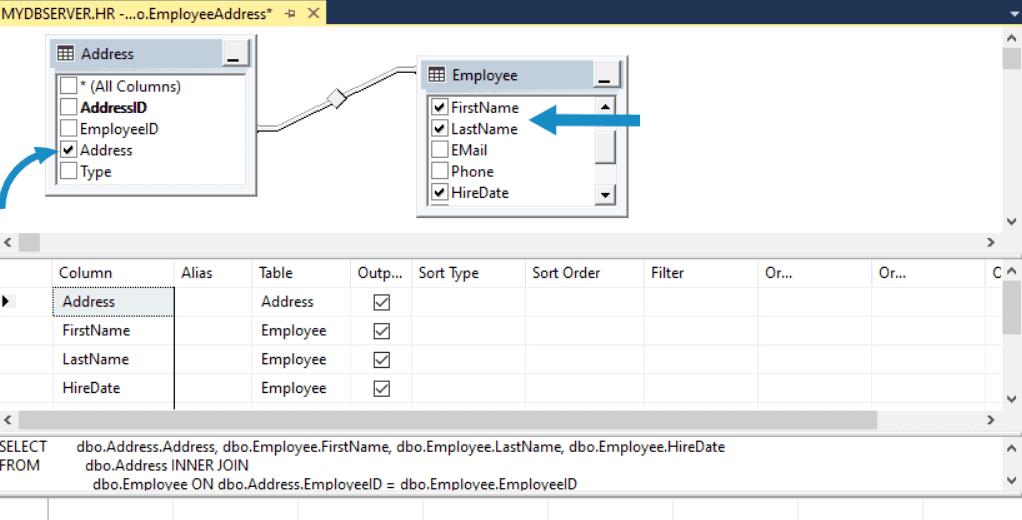
Step 7: In the Criteria pane, select sort or filter criteria.
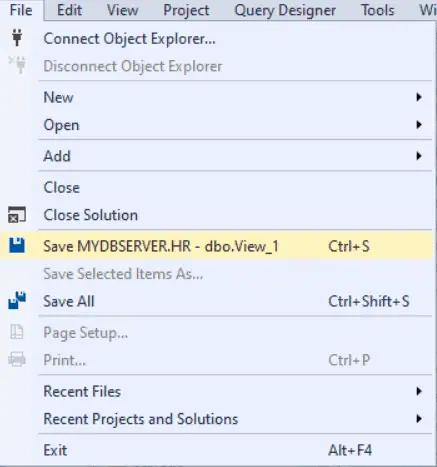
Step 8: From File menu, click Save view name.
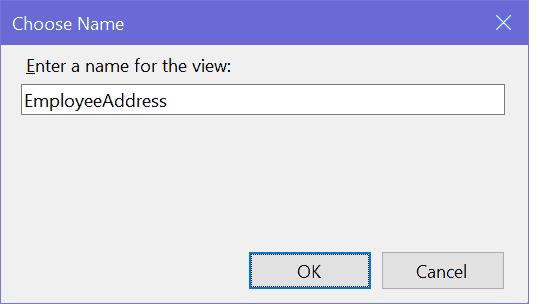
Step 9: In the Choose name dialog box, enter a name for the new view. Click Ok.
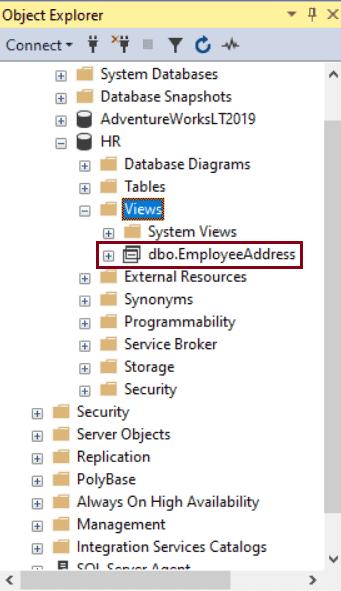
To see the new view, refresh the Views folder under the database instance in Object Explorer.
Learn how to modify or delete views in the next chapter.
