PostgreSQL: Insert Data into a Table
Use INSERT INTO statement to insert one or more rows into a table in PostgreSQL.
INSERT INTO <table-name> (<column1>, <column2>,...)
    VALUES (<value1>, <value2>,...)
RETURNING * or <column_name>;- Use the
INSERT INTOclause with thetable-namewhere you want to insert the data. If you want to insert data to all columns of a table, then specifying the list of columns is optional. - If you want to insert data to some columns, then provide a list of comma-separated values after the
VALUESclause. - The
RETURNINGclause is optional which will return a list of all inserted values or the value of the specified column.
let's create the following employee table where we will insert data.
CREATE TABLE employee (
    emp_id 	INT PRIMARY KEY,
    first_name VARCHAR(50) NOT NULL,
    last_name VARCHAR(50) NOT NULL,
    gender CHAR(1),
    birthdate DATE,
    email VARCHAR(100) UNIQUE,
    salary INT
);
Now, the following INSERT statement will inserts data in the employee table.
INSERT INTO employee
VALUES(1,'Annie','Smith','F', DATE '1988-01-09', '[email protected]',5000);
The above INSERT statement will insert data into all the columns of the employee table. Column values are specified in the VALUES clause.
If you do not specify the required column (NOT NULL column) in the INSERT statement, Postgres will raise an error. If you do not specify the optional column (NULL column) then the INSERT statement will add NULL or DEFAULT value (if specified) in the table.
To insert character or string data, it needs to be enclosed in single quotes 'value'. To insert a date value to the column with DATE datatype, need to specify the date in ‘YYYY-MM-DD' format.
If the table has a SERIAL column, Postgres will automatically generate a sequence number for the serial column. No need to specify a value for that column in the INSERT statement.
Executing the above query in pgAdmin will display the following result:
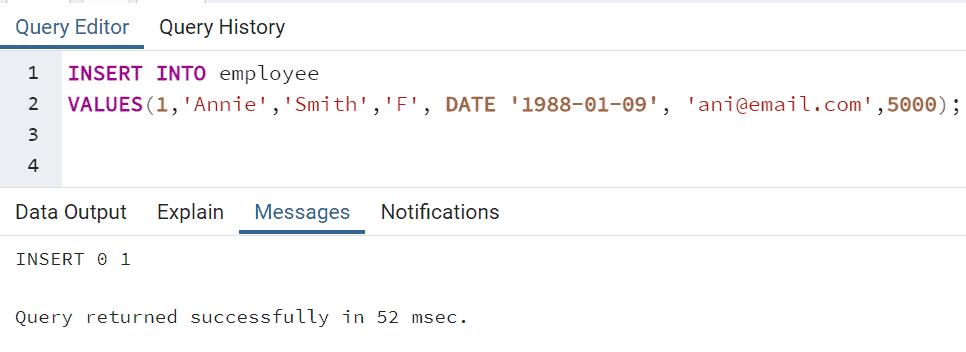
Executing the INSERT INTO statement will return INSERT oid count as a result along with the query execution status like "Query returned successfully in 52 msec." in pgAdmin.
In the INSERT oid count, the oid is an object identifier which will always be 0 for the INSERT statement. The count is the number of rows inserted to the table. The above statement inserted a single row, so it will return INSERT 0 1.
You must specify values for the column in the order of columns defined in the table, otherwise, it will result in wrong data insertion or an error. For example, the following tries to insert a date value in the gender column and so it will return an error.
INSERT INTO employee
VALUES(1,'Annie','Smith',DATE '1988-01-09','F');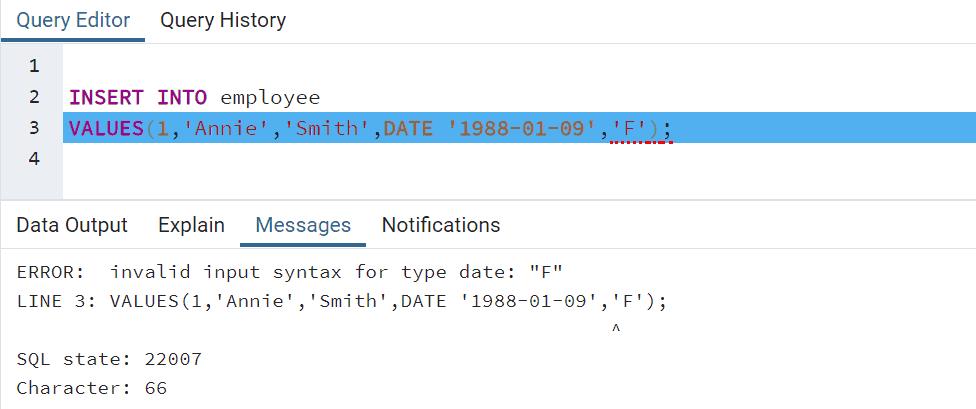
It is the best practice to specify columns names with the INSERT statement to insert data into correct columns and make it more maintainable. Thus, if you add columns in the table in the future, it will not raise errors.
INSERT INTO employee(emp_id, first_name, last_name, gender, birthdate, email, salary)
VALUES(1,'Annie','Smith','F', DATE '1988-01-09', '[email protected]',5000);
You can change the order of the columns or remove columns from the INSERT statement as per your need.
INSERT INTO employee(emp_id, first_name, last_name, birthdate, gender)
VALUES(1,'Annie','Smith', DATE '1988-01-09', 'F');
RETURNING clause
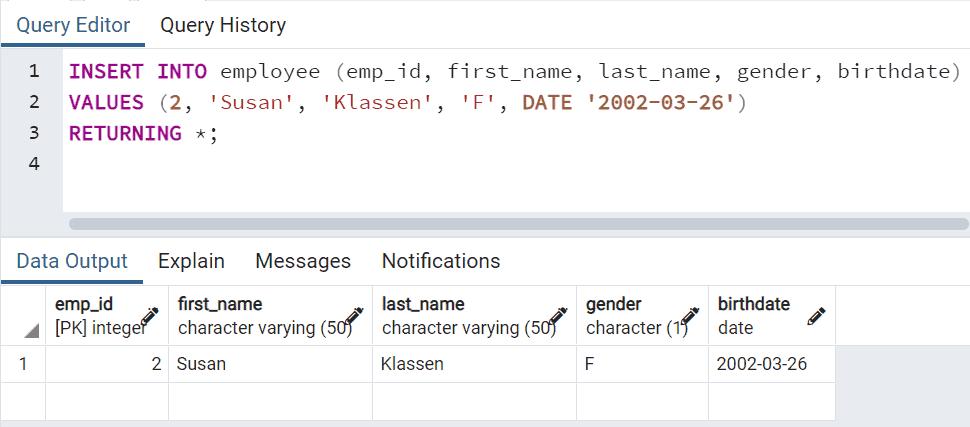
The RETURNING clause returns inserted column values. The RETURNING * returns all the inserted values or RETURNING column-name returns the specified column value.
This is useful when you have an auto-generated SERIAL column as a primary key. You can get the generated value using the RETURNING clause.
INSERT INTO employee (emp_id, first_name, last_name, gender, birthdate)
VALUES (2, 'Susan', 'Klassen', 'F', DATE '2002-03-26')
RETURNING *;
The above query will display the following result in pgAdmin.
To return specific inserted column after insertion, specify column name after RETURNING clause. Bellow will insert data to the employee table and return the newly inserted emp_id.
INSERT INTO employee (emp_id, first_name, last_name, gender, birthdate, email)
VALUES (3, 'May', 'Kaasman', 'M', '1994-07-09', '[email protected]')
RETURNING emp_id;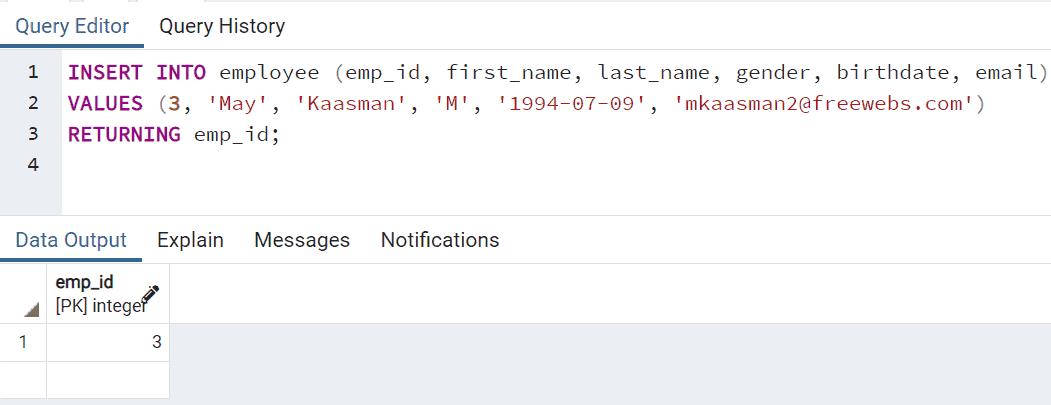
The returned value can be renamed using AS clause. The following renames emp_id column to EmployeeId using AS clause.
INSERT INTO employee (emp_id, first_name, last_name, gender, birthdate)
VALUES (4, 'Charlton', 'Duran', 'M', DATE '2010-10-02')
RETURNING emp_id AS EmployeeID;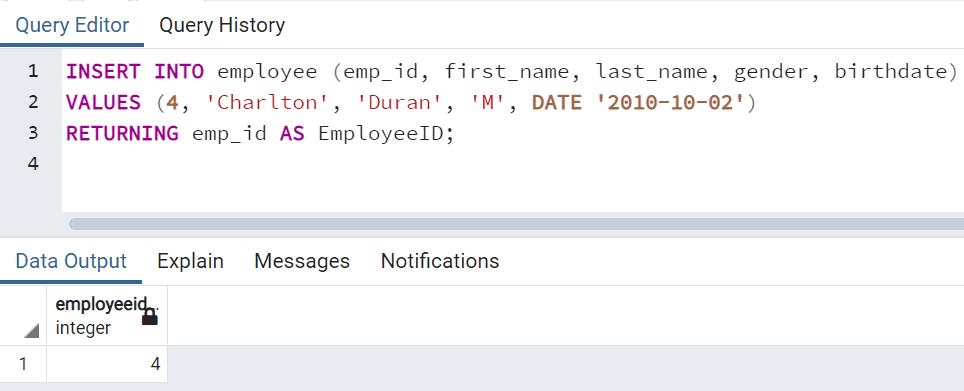
Insert Multiple Rows
The INSERT statement can also add multiple rows to a table in a single query by specifying multiple VALUES clauses.
The following will insert two rows to the employee table:
INSERT INTO employee(emp_id, first_name, last_name, gender, birthdate)
VALUES
	(5,'Sachin','Tendulkar','M', DATE '1978-01-09'),
	(6,'Kapil', 'Dev', 'M', DATE '1959-03-26'),
  	(7,'Joe','Root','M', DATE '1988-11-29'),
	(8,'Moeen', 'Ali', 'M', DATE '1999-04-16');
The above query will insert four rows into the employee table and display the following result in pgAdmin.

You can also use the RETURNING clause while inserting multiple rows, as shown below.
INSERT INTO employee(emp_id, first_name, last_name, gender, birthdate)
VALUES
	(5,'Sachin','Tendulkar','M', DATE '1978-01-09'),
	(6,'Kapil', 'Dev', 'M', DATE '1959-03-26'),
  	(7,'Joe','Root','M', DATE '1988-11-29'),
	(8,'Moeen', 'Ali', 'M', DATE '1999-04-16')
RETURNING *;
The above will display the following result in pgAdmin:

PostgreSQL might raise errors for some rows when inserting multiple records from one table to another table. Use the UPSERT operation to handle errors in bulk insert operation. Learn about it next.
