Install an SSL Certificate in localhost Website in IIS
We set a custom domain name to our localhost website as www.mywebsite.com. Now, we want to create a self-signed SSL certificate and install it for our website.
The needed steps are:
- Create the self-signed SSL certificate
- Add binding for https
Create a Self-Signed SSL Certificate
First of all, we need to create an SSL certificate to bind it with our local website www.mywebsite.com.
Use the makecert utility located in the C:\Program Files (x86)\Windows Kits\10\bin\x64 folder to create SSL certificates. Open the command prompt as administrator and navigate to the path where makecert.exe is located. Execute the following command. Note that CN=www.mywebsite.com.
makecert -r -pe -n "CN=www.mywebsite.com" -b 01/01/2019 -e 01/01/2029 -eku 1.3.6.1.5.5.7.3.1 -ss my -sr localMachine -sky exchange -sp "Microsoft RSA SChannel Cryptographic Provider" -sy 12Once we created a certificate successfully, it's time to add it in the Trusted root authority.
Open mmc.exe by entering mmc.exe in the Run window. This will open the following window.

Go to the File menu and click Add or Remove Snap-ins. This will open the Snap-ins popup as shown below.
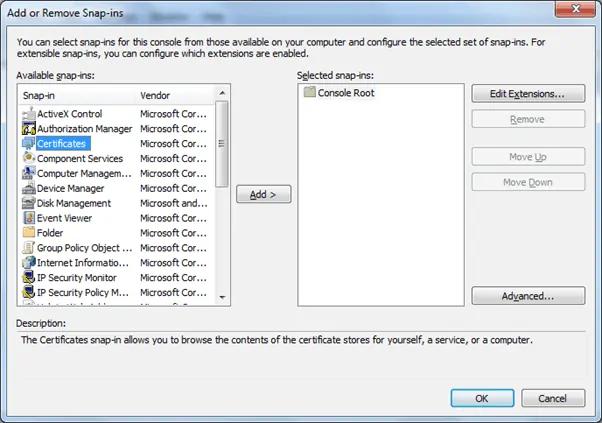
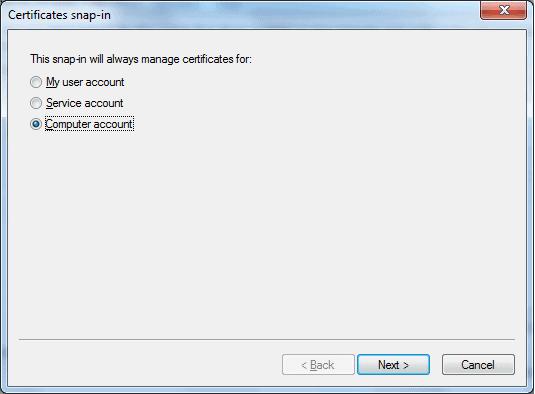
From the Add or Remove Snap-ins window, select Certificates and click on the Add > button. Select Computer account from the Certificates snap-in window, as shown below and click Next.
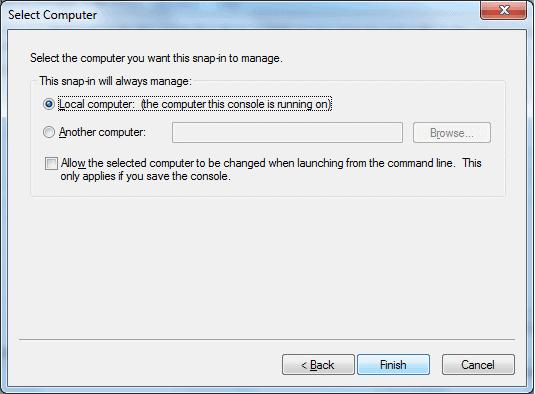
Select Local computer and click Finish.
This will add Certificates in the Snap-ins popup, as shown below.
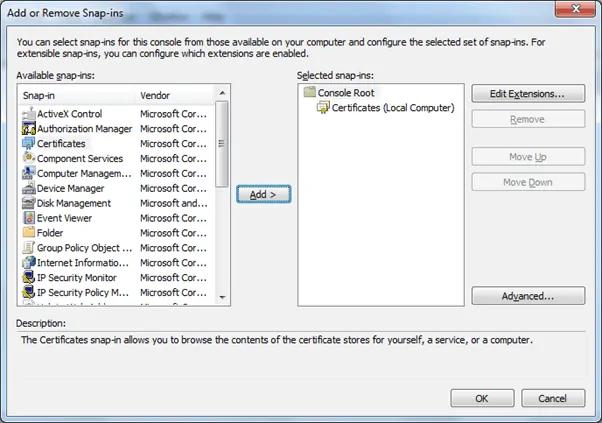
Click OK to see all the certificates in the Console as shown below. You can see our new certificate for www.mywebsite.com under the Personal > Certificates node.
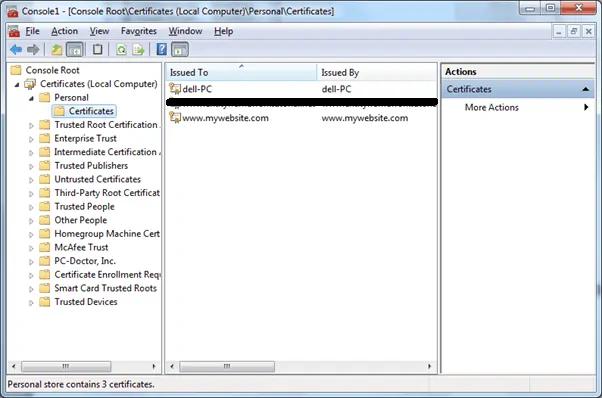
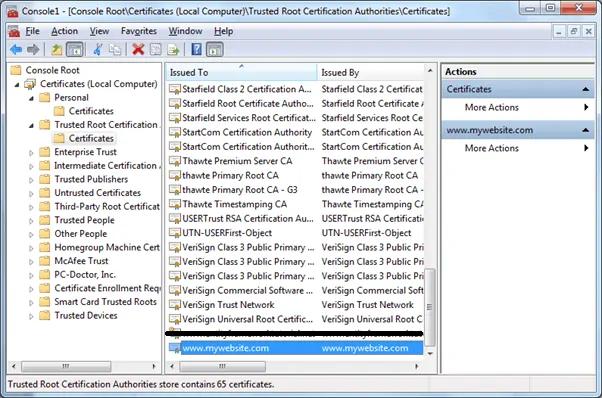
Right click on the certificate, copy the certificate and paste it under the Trusted Root Certificates Authorities > Certificates node.
Add https Binding
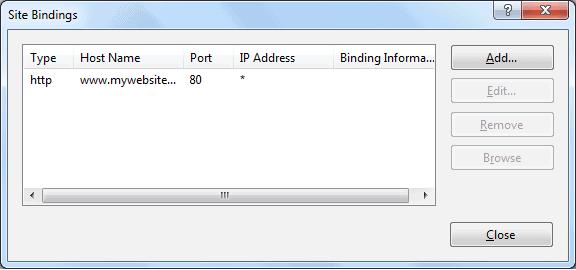
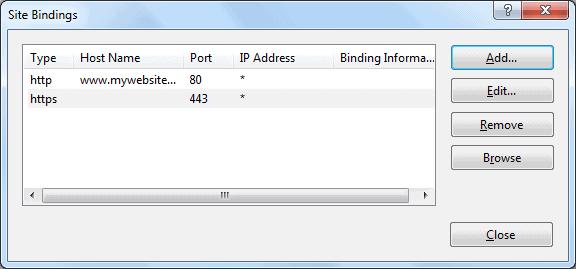
Now, we need to bind the https protocol to our website. Go to IIS manager and select mywebsite, which we created earlier. Click on the bindings… link in the right-side pane. This will open the Site Bindings dialog box, as shown below.
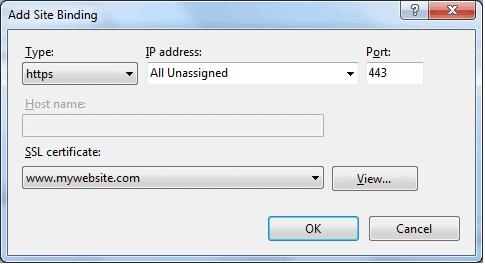
Now, we need to add the https binding, so click on the Add button. From the Add Site Binding popup, select Type as https and select our certificate www.mywebsite.com from the SSL certificate dropdown. Click OK.
You can see that now we have two site bindings: http and https.
Now open the browser and enter https://www.mywebsite.com to see the page, as shown below.
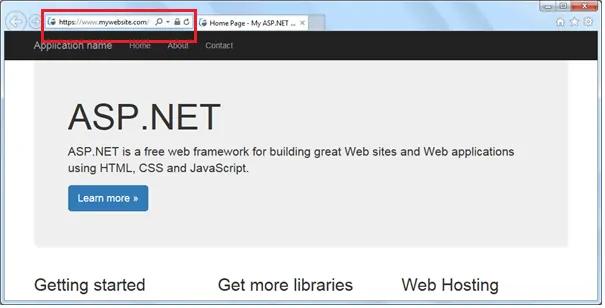
Thus, we can use a custom domain name and a self-signed certificate to the localhost website.
